Thursday, December 11, 2014

11 Levitation


Defy gravity and fly with this assignment!!!
Levitation photography challenges photographers in several areas:
Planning, positioning, background, posing, props, lighting, editing.
Create portraits that defy gravity

Several things that you MUST consider in your image creation:
  • Consider the environment/location/composition.
  • Consider your model, what are they wearing, will it hang or flutter when flying.
  • What small things can you do to make the image appear more realistic? What can support it?
  • Keep your camera in one place- Use a tripod.
  • Always take a clean shot of the background so you have something for reference during editing.
  • Shoot the same day with the identical lighting. Close to the first photo, so shoot quickly so the lighting will be the same in each composite image.
  • Shoot all the pieces that you will need in the location.
  • Think ahead of the items that will be removed.
Get help if you need it. You may need an assistant too.
Plan- Before you head out, sketch out your idea, list your model, your location, props, chair etc. anything you need. Write on paper, or in your journal.
Shoot- several frames of the background and your model and props.
Make- A contact sheet include your backgrounds, model, props (before the edit).
Edit- Create 3 composite images in Photoshop using either the same image with different positioning or props, or different images altogether, it is up to you.

Sites to help you develop ideas:
Invisible Bicycles
Dreaming of Flying
A Case of Levitation This one has an era and a story.
This Levitation Tutorial is really good to get you started on a theme.

Images and Contact Sheet Due: Monday, January 5th 2015.
3 Levitation Composite Images Due: Monday, January 12th 2015.

Tuesday, December 9, 2014

11 Photoshop Tutorials

Converting Daylight Images into Evening Light
Day to Night Tutorial- This one is pretty good.
Day 2 Night- They are using a different version of Photoshop, but check further on for the lighting techniques.
Day 2 Night- they do it a bit differently, but worth a look.

Converting Digital Photos into BW
Digital BW Tutorial
BW Advanced

Spot Colour
Selective Colour on BW Photo
Selective Colour Tutorial- a different way to selective colour

Portrait Touch-up
Portrait Touch-up Tutorial

Due Monday, Dec. 8th

Thursday, December 4, 2014

12- 5 Points about 5 Photographers

Research 5 (or more) Photographers.
Find your top 5 five favourite photographers. Write 5 important points about each photographer, include their name, an image, and website(s) where you can find information about them.
Post your findings to your blog.
Due Friday, Dec 5th

Monday, December 1, 2014

12 Contemporary Photographer

Research-Select-Write-Email-Share-Photograph
  1. Research several using the internet. Find your top 5 five favourite. Write 5 important points about each and put in your journal with an image for each and narrow it down to one.
  2. Select a photographer who is currently living and working in the medium. Find a photographer who you are interested in. This is likely the most challenging and important of the steps; find a photographer that inspires you. 
  3. Email your photographer, let them know that you are interested in their work and you are doing a project for school based on their work. Ask them for some information. Print out your email to them and their response.
  4. Write an article about the photographer's life, the medium, photo style and offer an opinion reflection and commentary of their work in 500 to 750 words. Include a bibliography.
  5. Share your contemporary photographer with the class any way you want. You are to articulate information from your article to the class verbally, and visually.
  6. Photograph in their style, create a contact sheet and five 5 x 7 prints and one 8 x 10 print.
To select your photographer, do a Google search based on the qualities you admire in people ie. "courageous photographers" or "photographers who inspire change", or style medium: landscape, fashion, still life.... Let's see what you come up with.

When you find your photographer, make sure there is some information about them even a resume can be helpful, but it will help to get more. And you will need to find at least five photos of their style. Send them an email to ask questions that you are curious about their work, process, style, choices, method etc.

Here are some links to help you search photographers,
International Center of Photography - In New York. Visit the "Museum" Current and Past Exhibitions. Maybe go to NY sometime and visit this place. Cool!
Photography Now- Visual list of contemporary photographers.
Yahoo Photo Masters- index of photographers, but these are mostly old ones.
Museum of Contemporary Photography- look up collections and also browse by artist. (I love Colleen Plumb.)
Magnum Photo
CAPIC
PPOC

Thursday, November 27, 2014

Day to Night Mixed LightingEffect


Turning day to night adds a dramatic effect to day time exposures.  Think of what kind of feeling or drama you plan to evoke in your photographs.  Portraits work well for this style of photography but you are welcome to try and light an outdoor space or object too.  Using this technique, the sun becomes your fill light and the flash is your main light.
Technique
Setting Up the Flash
  1. Use an off camera flash for a more dynamic looking image.  A flash on a stand works well and position it so that you don't lose detail in your focal point. The position of the flash is important. Also the reflective umbrella will create more harsh/defined shadows.
  2. Use the Manual setting on your flash at FULL power.  1/1
  3. You can minimize the amount of light in several ways... move the flash away from your subject; turn down your flash power; or change your aperture.
Setting the Camera
  1. Set your camera to "M".
  2. Start with your camera's MAX sync speed to flash (usually 1/250).
  3. Lower ISO 100.
  4. Adjust the aperture to set exposure- set your exposure/light meter to expose your main subject correctly. Best if you can use a smaller opening (higher aperture).
Assignment

  1. Take 3 different scenarios using the day to night mixed lighting technique.
  2. Experiment with the key shifting effect for each scenario. Bracket with your shutter from 1/1 to 1/250 (use full shutter speeds 1,2,4,8,15,30,60,125,250).
  3. 1 Contact Sheet (30-40 photos).
  4. 3 Images. One from each shoot (different location / subject).
Due December 8.
LINK to YOUTUBE VIDEO

Sunday, November 16, 2014

12 Studio Still Life Project

This is a mostly a technical assignment, but you need to factor in some visual design principles and composition too. The objective is for you learn about lighting a variety of surfaces in the studio. You need to follow specific lighting procedures and pay close attention to technical considerations: depth of field, white balance and exposure.  Compose an aesthetically pleasing and creative composition. Use the standard lighting styles to effectively light glass, metal, textured objects.

Create three different studio still life compositions incorporating the assigned lighting techniques for each metal, glass and texture. Compose a setup for each: include backgrounds, a table and covering, and use one or two lights. Here is the Still Life Project Criteria

Find studio photograph examples of each technique: metal, glass, texture and post them to your blog.
Set-up and photograph your items.
Create a contact sheet.
Post three 5 x 7 prints [one+ of each] on your blog/journal and save to the share file for a critique.
Due November 24th

11 HDR Landscapes

High-dynamic-range imaging (HDR) is a set of techniques that allow a greater dynamic range of luminance between the lightest and darkest areas of an image than current standard digital imaging techniques or photographic methods. This wide dynamic range allows HDR images to more accurately represent the range of intensity levels found in real scenes, ranging from direct sunlight to faint starlight. The two main sources of HDR imagery are computer renderings and merging of multiple photographs, the latter of which in turn are individually referred to as low-dynamic-range (LDR) or standard-dynamic-range (SDR) photographs.

Exposure Compensation

HDR Tutorials


HDR Assignment:

  1. Find some examples of cool HDR images for your journal/blog.
  2. Using the exposure compensation mode on your digital camera and take several sets (3 or more) of images of one topic with different exposures.
  3. Keep your camera steady and in the exact same place for each exposure. Good to use a tripod.
  4. Try 5 different landscape scenes with multiple exposures in different location.
  5. Download, save a contact sheet to the share folder or to your blog.
  6. Merge 3+ images into one HDR photo.
  7. Use Adobe Photoshop to merge together. Then try Photomatix.
  8. Upload 2 or more of your HDR images to your blog / journal.
Due November 24


Thursday, November 6, 2014

11 Painting with Light

For this project, find a dark room, and/or go out into the night with your camera and try some slow shutter speed experiments.
  1. Painting with light toward the camera
  2. Painting with light toward the subject
  3. Painting with light with a flash
  4. Multiple exposures
  5. Slow blur with stoppage time
  6. Long exposure with low light- night or early morning.
Take at least 4 exposures per experiment. Print a contact sheet of 30-35 images of different shutter exposures, with your experiments labelled. Save your contact sheet to the share folder.

Put your best image in your journal and save to the share folder

Here are some videos and websites to inspire some ideas:
Willowz Jubilee
Painting with Light
Cool Light
Stupid Gratuitous Violence, but Cool
Airstream Trailer
Greg Schurman @ Blootung Studios
LumoArt
Jan Leonardo
Pixel Stick

Tuesday, November 4, 2014

12 Principle of Design- Contrast

Contrast in Design: Is the arrangement of opposite elements (light vs. dark colors, rough vs. smooth textures, large vs. small shapes, etc.) in a piece so as to create visual interest, excitement and drama.

Emphasis is a principle of art which occurs any time an element of a piece is given dominance by the artist. In other words, the photographer/artist makes part of the work stand out, in order to draw the viewer's eye there first.
Frequently, emphasis is achieved by means of contrast. Obvious contrasting elements create focal points, meaning: places to which one's attention cannot help but be drawn.
All worthy works of art employ emphasis for, lacking this principle, a piece seems monotonous and boring to the eye.

Assignment- Take a roll (30-40 digital) concentrating completely on "Contrast" in your frame. Topic is up to you. Make a contact sheet, save to the share folder and paste your best in your journal/blog.
 

Monday, November 3, 2014

12 Term 1 Assignment List

Summer **
Selfie **
Element Contact Sheet
6 Elements **
Excess Contact Sheet

Balance Contact Sheet
1 Balance **
Movement Contact Sheet
1 Movement Compensation  **
Repetition Contact Sheet
1 Repetition Photo **
Rhythm and Pattern Contact Sheet
1 Rhythm and  1Pattern Photo **

** Images saved to blog
Contact sheets saved to share folder (and/or blog)

11 Term 1 Assignment List

Summer **
Selfie **
Element Contact Sheet
6 Elements **
Apple/Emphasis Contact Sheet
5 Apple Images labelled with emphasis technique **
White Balance Contact Sheet
8 White Balance **
Exposure Compensation Contact Sheet
5 Exposure Compensation  **
Short Depth of Field Contact Sheet
3 Short Depth of Field Photos **

** Images saved to blog
Contact sheets saved to share folder (and/or blog)

Tuesday, October 28, 2014

11- Short Depth of Field

Camera Lens/ Aperture

Aperture is the opening of your lens. The aperture opens and closes to allow more or less light in to your camera; it effects the amount of light that is allowed into your frame. It also effects how much of the frame is in focus. Aperture is defined by f/stops; the smaller the f/stop number (f/2.8), the larger the opening.

Depth of Field
Is the amount of the image that is in focus.

Three Things that Control Depth of Field
1. The Aperture: The larger the opening, the more light can get in, and the more blurry the background or foreground will be.
2. The Size of the Lens: Shorter the lens, the more that will be in focus.
3. Distance to Subject: The closer to the subject, the less amount in focus.

How to Set your Camera to Shoot Short Depth of Field only:
Set your camera to Aperture priority mode (it’s usually indicated by a capital “A” or an “Av.”). Find a scene that you want to photograph, then set the f/stop to the lowest number that your lens can go. This will help to create a shallow depth of field. Your depth of field will be even more shallow if you are closer to the subject that you are focusing on.

[To create a long depth of field then set it to the highest setting. This will extend your focus further into your frame.]

ASSIGNMENT- Short Depth of Field Only:
Use a short depth of field for the whole roll. Select compositions that only work with short depth of field. Use a 50mm (normal) lens. Try the lowest aperture setting on your camera that will allow you to shoot (depends on lighting). Get close to your subject. Shoot a full roll 25-40 all using short depth of field. Create a contact sheet of 25-40 short depth of field images, save your best 3 to your blog and to the share folder.

Advanced Photo Students: try a few using the "BOKEH" effect
Bokeh comes from the Japanese word boke (ボケ), which means "blur" or "haze", or boke-aji, the "blur quality." Bokeh is pronounced BOH-KÉ™ or BOH-kay. Bokeh is defined as “the effect of a soft out-of-focus background that you get when shooting a subject, using a fast lens, at the widest aperture, such as f/2.8 or wider.” Simply put, bokeh is the pleasing or aesthetic quality of out-of-focus blur in a photograph.
To increase the likelihood of visible bokeh in your photographs, increase the distance between your subject and the background. You can do this by decreasing the distance between the camera and subject. The more shallow the depth-of-field, or further the background is, the more out-of-focus it will be. Highlights hitting the background will show more visible bokeh too, so if you’re using a backlight, side light or a hair light, the bokeh may be more pleasing to the eye. Usually when there is low lighting with small light sources.

12 Pattern & Rhythm

 
Pattern
Pattern is another great principle to incorporate into your photography. You can create a pattern with any kind of repeated shape. These repeated photographic elements will create a type of unity and structure to your photography. By finding a pattern in lines,shapes, or colors you can easily add rhythm to your photographs that the human eye will easily follow.
 
Rhythm
When motifs or elements are repeated, alternated, or otherwise arranged, the intervals between them or how they overlap can create rhythm and a sense of movement. In visual rhythm, design motifs become the beats. Rhythms can be broadly categorized as random, regular, alternating, flowing, and progressive.
Random Rhythm - Groupings of similar motifs or elements that repeat with no regularity create a random rhythm. Pebble beaches, the fall of snow, fields of clover, herds of cattle, and traffic jams all demonstrate random rhythms. What may seem random at one scale, however, may exhibit purpose and order at another scale.
Regular Rhythm - Like a heart or song with a steady beat, regular rhythm is created by a series of elements, often identical or similar, that are placed at regular or similar intervals, such as in grids. Simple regular rhythms, if overused, can be monotonous.

Assignment- Take a roll (30-40 digital) concentrating completely on "Patterns & Rhythm" in your frame. Topic is up to you. Make a contact sheet, save to the share folder and paste your best in your journal/blog.

Wednesday, October 22, 2014

12- Principle of Design- REPETITION

REPETITIONThe principle of repetition is the reusing of the same or similar elements throughout a design. Repetition of certain design elements in a design will bring a clear sense of unity, consistency, and cohesiveness o multiples.

REPETITION is the use of similar or connected pictorial elements- similar shapes, colours or lines that are used more than once

REPETITION can be regular or irregular, even or uneven.

REPETITION can be in the form of RADIATION where the repeated elements spread out from a central point.

REPETITION may be in the form of GRADATION where the repeated elements slowly become smaller or larger.

REPETITION works with pattern to make the artwork seem active. The repetition of elements of design creates unity within the artwork.

Compose 30-40 photographs concentrating on REPETITION as your design focus. Download, create a contact sheet of 30-40 images and post your best image to your journal/blog.

Tuesday, October 21, 2014

12-Movement

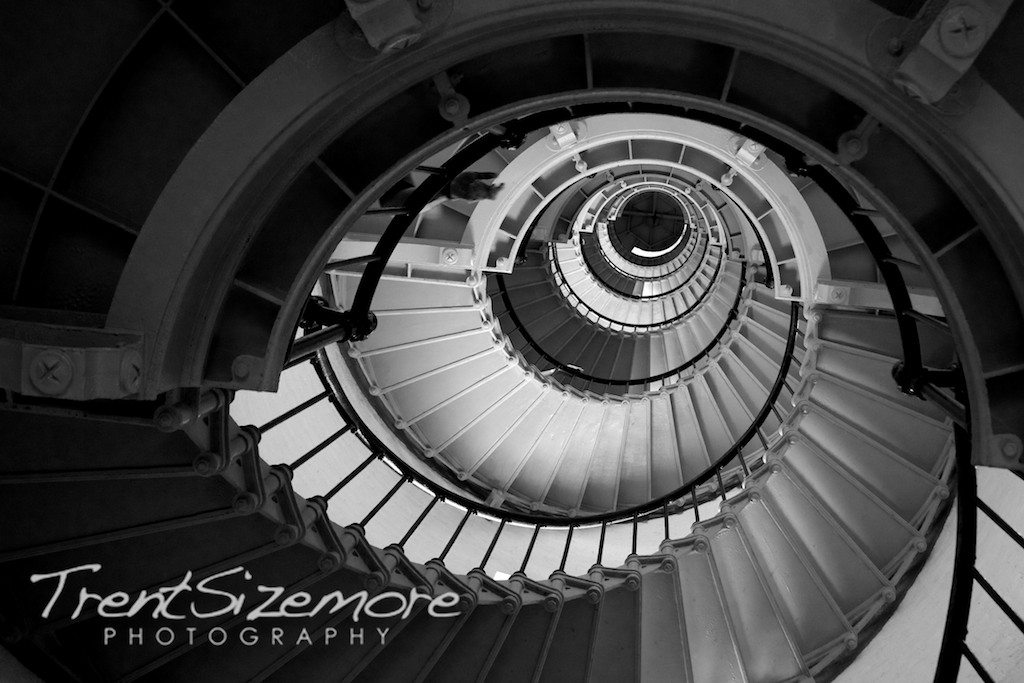
Definition of Movement: is the path the viewer’s eye takes through the artwork, often to a focal area. It can be directed along lines, edges, shapes and color. Movement is closely tied to rhythm. Your eye moves through this image, because the lines are spiral you through to the core. The contrast between the light and the background make the light areas and the lines stick out. 

Assignment- Take a roll (30-40 digital or BW) concentrating completely on "Movement" in your frame. Topic is up to you. Make a contact sheet and paste your best in your journal.


Monday, October 20, 2014

12-Balance

https://blogger.googleusercontent.com/img/b/R29vZ2xl/AVvXsEhJ3E6nfc5uem88O7yM4yaux_tTDUz-tNIbDvQ2kXNecDBtNYQaakkc5gEDTGGR7d4S6KCeZcXteoYfmNYo6Txr6shwo529ls2KQtSYYy7ngFOrcgpy3mghjcaXRUbRQWu5bASuqbm1PF4Q/s1600/801942290_cac9b49f77.jpg Balance is a photography technique that involves capturing images within a frame so all parts of the image have equal visual weight. Proper balance should increase the visual appeal of a photograph. There are generally two types of balance, formal and informal.
Formal balance is symmetrical balance. To achieve this type of balance, the focus of the picture should be placed in the middle of the image, while identical or similar subjects are evenly spaced around the central point. Portraits are an example of a picture where it is best to use formal balance.
Informal balance is more indistinct in nature. In a photograph with informal balance, dissimilar elements balance each other out on either side of the frame. Informal balance can occur with objects of any size, but it is most visually appealing to have a larger object balanced out with a smaller object or several smaller objects. This type of balance usually follows the rule of thirds.
Other ways to informally balance photos include having a small area of white against a large area of black, or black against white. This principle also works with vibrant colors against neutral colors. A small area of highly textured material can also balance out an area with little texture.
Assignment- Take a roll (30-40 digital or BW) concentrating completely on "Balancing" your frame. Either Symmetrical or Asymmetrical Balance. Topic is up to you. Make a contact sheet and paste your best in your journal.


Thursday, October 16, 2014

White Balance


White Balance (WB) is the process of removing unrealistic color casts, so that objects which appear white in person are rendered white in your photo. Proper camera white balance has to take into account the "color temperature" of a light source, which refers to the relative warmth or coolness of white light. Our eyes are very good at judging what is white under different light sources, but digital cameras often have great difficulty with auto white balance (AWB) — and can create unsightly blue, orange, or even green color casts. Understanding digital white balance can help you avoid these color casts, thereby improving your photos under a wider range of lighting conditions.


For this technical assignment:
Try all of the Auto White Balance settings on your camera while photographing the exact same scenarios. Don't move a hair. Stay in the exact same place only change the WB on your camera (finish with custom WB). Try three different set ups in three different kinds of lighting i.e. outside/daylight, interior/fluorescent, interior/incandescent. Make a contact sheet of your different experiments 24 + photos and post one of the scenes in your journal/blog (8 photos with WBs labelled).

How to Set Custom White Balance:
1) Hold/Place your 18% Grey Card in the desired lighting & take a photo of it. Ensure you cover the entire frame with the Grey card & expose properly(the exposure meter should be balanced in middle i.e. 0 in your viewfinder).


2) Navigate to the second tab(Shooting Tab 2) under MENU on your Canon EOS DSLR. Select ‘Custom White Balance’. It will now open up the saved images on your memory card & prompt you to select one. Select the one of the Grey card you shot in step #1 above. It will ask you to use White Balance data from this image for custom white balance. Select Ok.

3) Now change the White Balance to ‘Custom’ from MENU & proceed to take your photograph. The photograph should have accurate colours.

Handy tips when using Custom White Balance:
* Once you’ve set a custom white balance for a particular light type (tube-light, bulbs etc), there is no need to set the white balance using grey card again. You only need to redo the above procedure if you happen to change the lighting setup. Remember, once you setup your custom white balance in your camera & start shooting, do NOT change the light setup. Or you’ll be plagued with improper white balance.
* It doesn’t matter if you shoot the Grey card shot in RAW or JPEG for setting Custom White Balance.
* While shooting the Grey card, using spot metering is recommended if you’re not able to get close to fill the entire frame with the Grey card.
* If you don’t have a Grey card, you can use almost any neutral grey surface to set the white balance (some use a white sheet of paper, but some white is not true white). If the surface is not totally neutral, you may need to make fine adjustments to your white balance later on computer in-spite of using a custom white balance.


Here is the difference between Auto White Balance & Custom White Balance. Notice the shifts in black. The entire image had a blue-ish tinge to it when shot in AWB. Even the wooden surface did not exhibit any wood like appearance. I set a ‘Custom White Balance’ & voila! The natural colours are back. Both the shots were taken at Standard Picture Style in Canon EOS DSLR & were unedited for this demonstration.
Now your task is to try setting custom white balance, taking a picture & then taking the same picture using Auto White Balance. Compare the results from both on your computer’s monitor & see the difference. I bet, you’ll become a follower of Custom White Balance.
Setting Custom White Balance
White Balance

Monday, October 6, 2014

12 Excess [Principles of Design]

Contrast
Movement
Balance
Unity and Harmony
Rhythm
Balance
Balance, Contrast, Emphasis, Harmony & Unity, Movement, Pattern, Repetition, Rhythm

Repetition
ex·cess
noun: excess; plural noun: excesses
1.      an amount of something that is more than necessary, permitted, or desirable.
"are you suffering from an excess of stress in your life?"

Principles of Design
Balance, Contrast/Emphasis, Movement, Pattern, Repetition, Rhythm, Unity/Harmony.

Photograph a simple subject with a variety of backgrounds, angles, lighting and distances using principles of design.

What to do………………………………………………
Excess- a simple concept packed with potential symbolism and cultural connotations. Construct and design frames using the concept “excess” using different principles of design scenarios each time. Use the Principles of Design definitions from your work sheet as your guide and try a least one of each principal. Really push the boundaries, meaning, and visual concept.

Be creative, using digital photography. Make 2 + contact sheets, seven- 5 x 7 working prints (one of each principle), and one 8 x 10 print of your best for your portfolio. Post best images on and in your blog/journal. We will have a critique on the due date.

Evaluation………………………………………………Each print will be out of 5 marks, part marks will be awarded for the following:
1 composition with clear use of design principles, 2 technical exposure and appropriate use of depth of field and shutter speed, 3 darkroom/Photoshop proficiency (not too much contrast, not too little), 4 originality, and 5 professional presentation.
Journal 7 found examples of Principles               7
2 Digital Contact Sheets                                      10
7- 5 x 7 prints (5 marks each)                            35
Final 8 x 10                                                            5
Total                                                          57

11 Apple- Composition Techniques

Framing
 Photographic Emphasis Techniques
Explore composition and visual story telling in Photography. Identify effective compositional techniques used to tell a visual story. Find the following emphasis techniques and define in your journal:
  1. Leading Lines
  2. Repetition
  3. Rule of Thirds
  4. Contrast
  5. Framing

Then take an apple and photograph it. Create compositions using the above techniques to emphasize. 


Project Outline:
Photograph a simple subject with a variety of backgrounds, angles, lighting and distances while concentrating on storytelling through composition techniques: contrast, framing, leading lines, repetition, rule of thirds.

Apple- a simple subject packed with potential symbolism and cultural connotations. You are to take your apple and your camera everywhere. Explore a variety of backgrounds and experiment with different emphasis composition techniques to construct and design frames to organize your apple.

What to do……………………………………………………
Take 35-40 digital photos of your apple in a variety of scenarios. Make a contact sheet. Then post/paste your top 5 images working prints to your blog/journal; there will be questions to respond to Print one 5 x 7 of your best. We will have a critique on the due date…

Evaluation……………………………………………………. 
Contact Sheet
Each print will be out of 4 marks, part marks will be awarded for the following:
·   Composition with clear use of emphasis technique.
·   Technical exposure/focus.
·   Originality storytelling. Creative
·   Professional presentation images are labelled and saved to the share file.
Found example of emphasis technique              5
Digital Contact Sheets are out of                        5
5 images posted to blog/journal     4 each=     20
Questions/Critique                                             10
Final 5 x 7 Print                                                     5
Total                                                        45