Tuesday, March 10, 2015

12 Landscapes

Each landscape shot should have a definite point of interest.
[Check out "Landscape Photography Tips" and keep in mind the following:
  1. Try placing your point of interest according to the rule of thirds.
  2. Don't place your horizon across the middle of the scene. A third of the way from the top or bottom is best, depending on the sky, or the ground.
  3. Be aware of foreground, and consider information that supports/enhances the primary interest.
    Consider using framing in your shot if appropriate.
    Where should you focus? Read this.
  4. Include the weather.
  5. Consider the time of day (golden hour is an amazing time to shoot- early or late in the day when the sun is low).
Landscape Assignment:
Take 25-40 photos of landscapes where you consider the above landscape techniques. Also, please read through "Landscape Photography Tips" 
Try each one of the tips above. Create a contact sheet of your explorations and post one of each techniques on your blog. 

Sunday, March 8, 2015

12 Mini Concentration


Explore what you are curious and even confused about. For the concentration project, seek out what interests you and explore it in depth through your lens in three different photographic mediums.

You are to photograph a series of images that communicate a topic. Your series should be intentional, thoughtful, and significant to you. Dig deep into your heart/ soul/ memory/ ancestry/ travels to find something meaningful to you; it should be something that you care about enough to photograph several times in many mediums. Each of your 6 final concentration images should be eye catching, incorporate strong composition techniques and integrate visual devices to clearly communicate your idea. Each image must be able to stand on its own and work together as a series conceptually and thematically.
  • Plans/Journal Ideas
  • 2++ Different Photo Techniques [other than plain old digital]: different lenses, filters, digital pin hole, film (B/W or colour), medium format, lomo/toy, pin hole, cyanotype/lumen prints, experimental, ...
  • 4+ Contact Sheets, (1 each week).
  • 12- 5 x 7 Working Photos 3 each shoot.
  • 6 Final 8 x 10 Portfolio Photos- professional presentation printed and presented in a book.
Here is the criteria and deadlines for the Concentration Project

Tuesday, February 24, 2015

Photography 11 Historical Photographer Project


Photography 11
Historical Photographer Project
Timeline & Evaluation

Part 1: Research                                        /25
Due Date: Feb 26
Research 5+ photographers: collect one+ signature photo and 5 points about each of them (what they contributed to the field, what they are known for etc). Finally, write 1-2 sentences about why you find (or don’t find) their work appealing.


Part 2: Article                                           /25
Due Date: March 5
From the list of 5 photographers you created in Part 1, select one photographer you would like to study further and share your choice with the rest of the class.  You will be writing an article about this photographer.

500-750 words – The paper is formatted with a title, image, and columns
Well Organized – Include and introduction, body paragraphs, and a conclusion
Historical Background – Include the photographer’s life events that relate to their photo pursuits; include experiences, education, and career development.
Describe their Work – What do they photograph? What makes it their style?
Personal Opinion – What do you like/dislike about their work? What interests you about their work?


Part 3: Contact Sheet #1                            /25
Due Date: March 12
Decide how you want to emulate the photographer you have chosen and create a contact sheet of images in their style. Consider the photographer’s use of lighting techniques, subject matter, perspective, etc. After this contact sheet is finished, have a mini-conference with Ms. Knowlson to talk about your photos, and where to go from here.


Part 4: Contact Sheet #2  & 5 – 5x7 Prints            /50
Due Date: April 2
Create a second contact sheet, and from both contact sheets select your 5 best images to print.

Style – There is a distinct likeness that captures an essence of the photographer’s style through the subject matter, lighting, format, treatment, perspective etc…
Technical – The use of technical considerations apply: focus, contrast, depth of field, exposure, however you craft your photo, it should mimic the photographer’s style.
Composition – The information is effectively organized, subject, emphasis, simplicity.
Creative – You have adapted the style of your chosen photographer in a unique way
Professionalism – The final presentation is professional, clean, and thoughtful.


Presentations                                                     /25
Due Date: April 9th, Presented on the 13, 14, or 16
Your presentation must be 5 minutes long and can take the form of a video, or PowerPoint presentation. Don’t include every detail you find about the artist – just what seems relevant to their work as a photographer.
Include:
-        5 examples of the artists work – explain why you chose the photos you chose. Why are they significant? What do they tell us about the artist?
-        5 samples of your own work, emulating the artist. Explain how you emulated the artist. What was the process you went through?
-        5 Questions. Prepare these in advance to ask your classmates at the end of your presentation. Try to think of questions that can spark a discussion about the artist.


Total:             /150

Monday, February 23, 2015

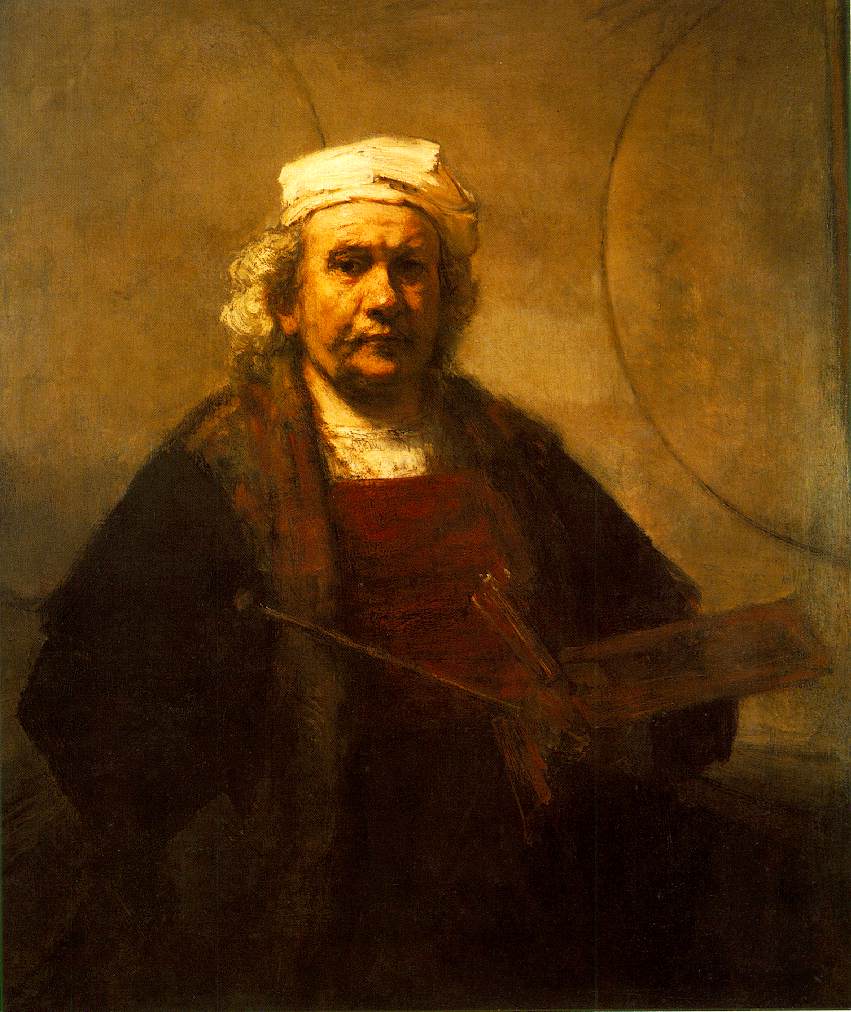
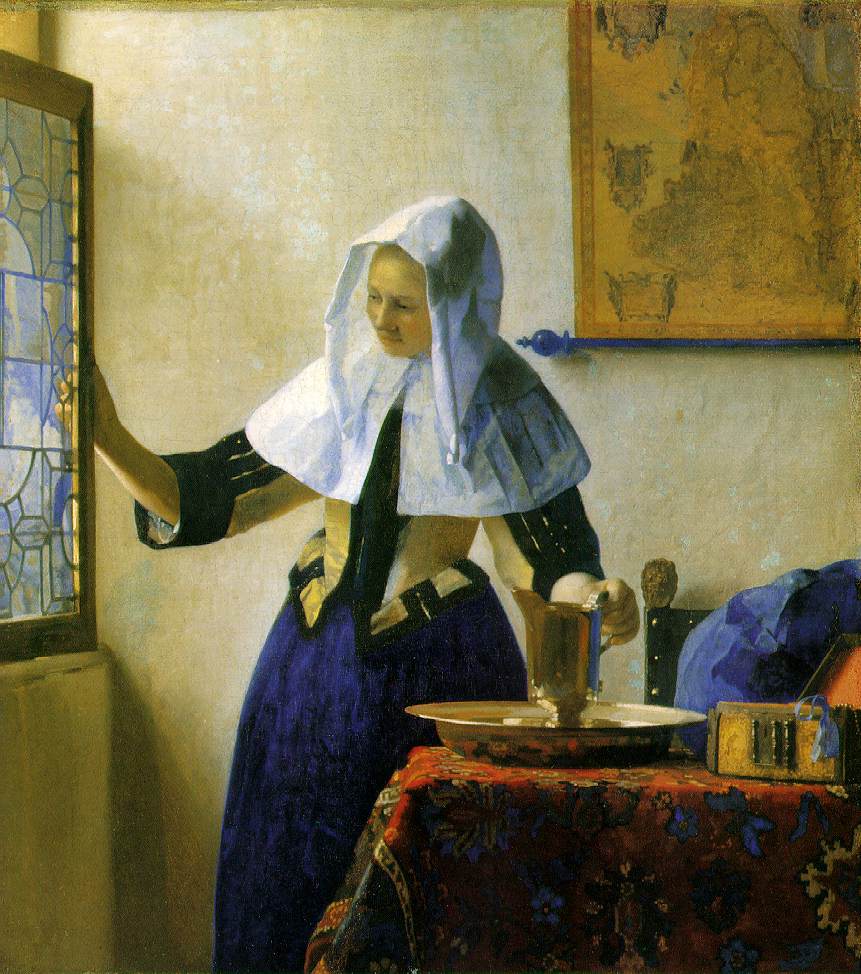
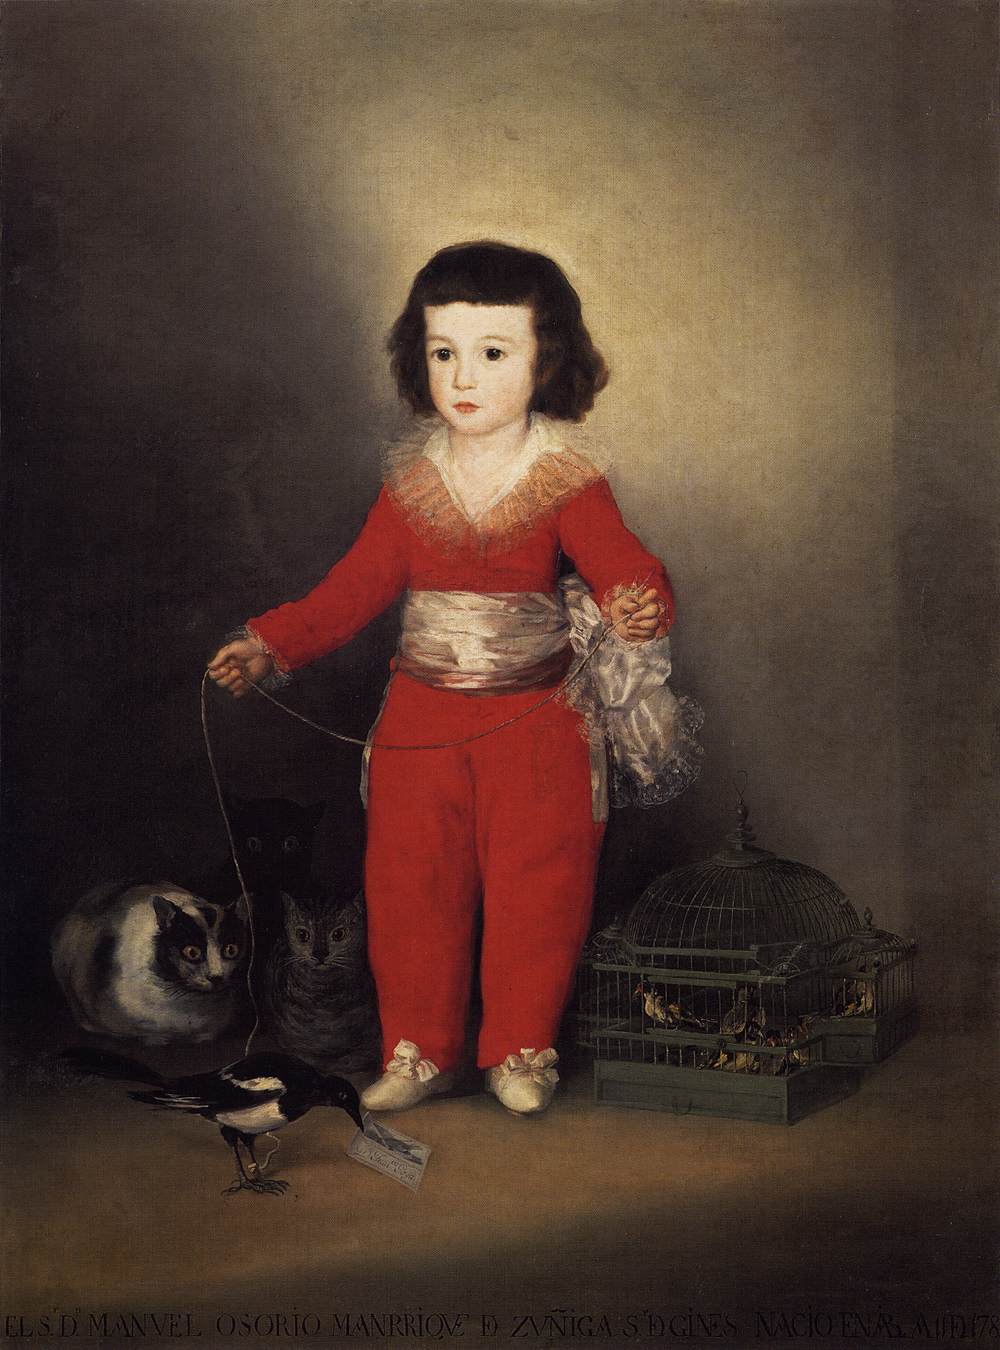
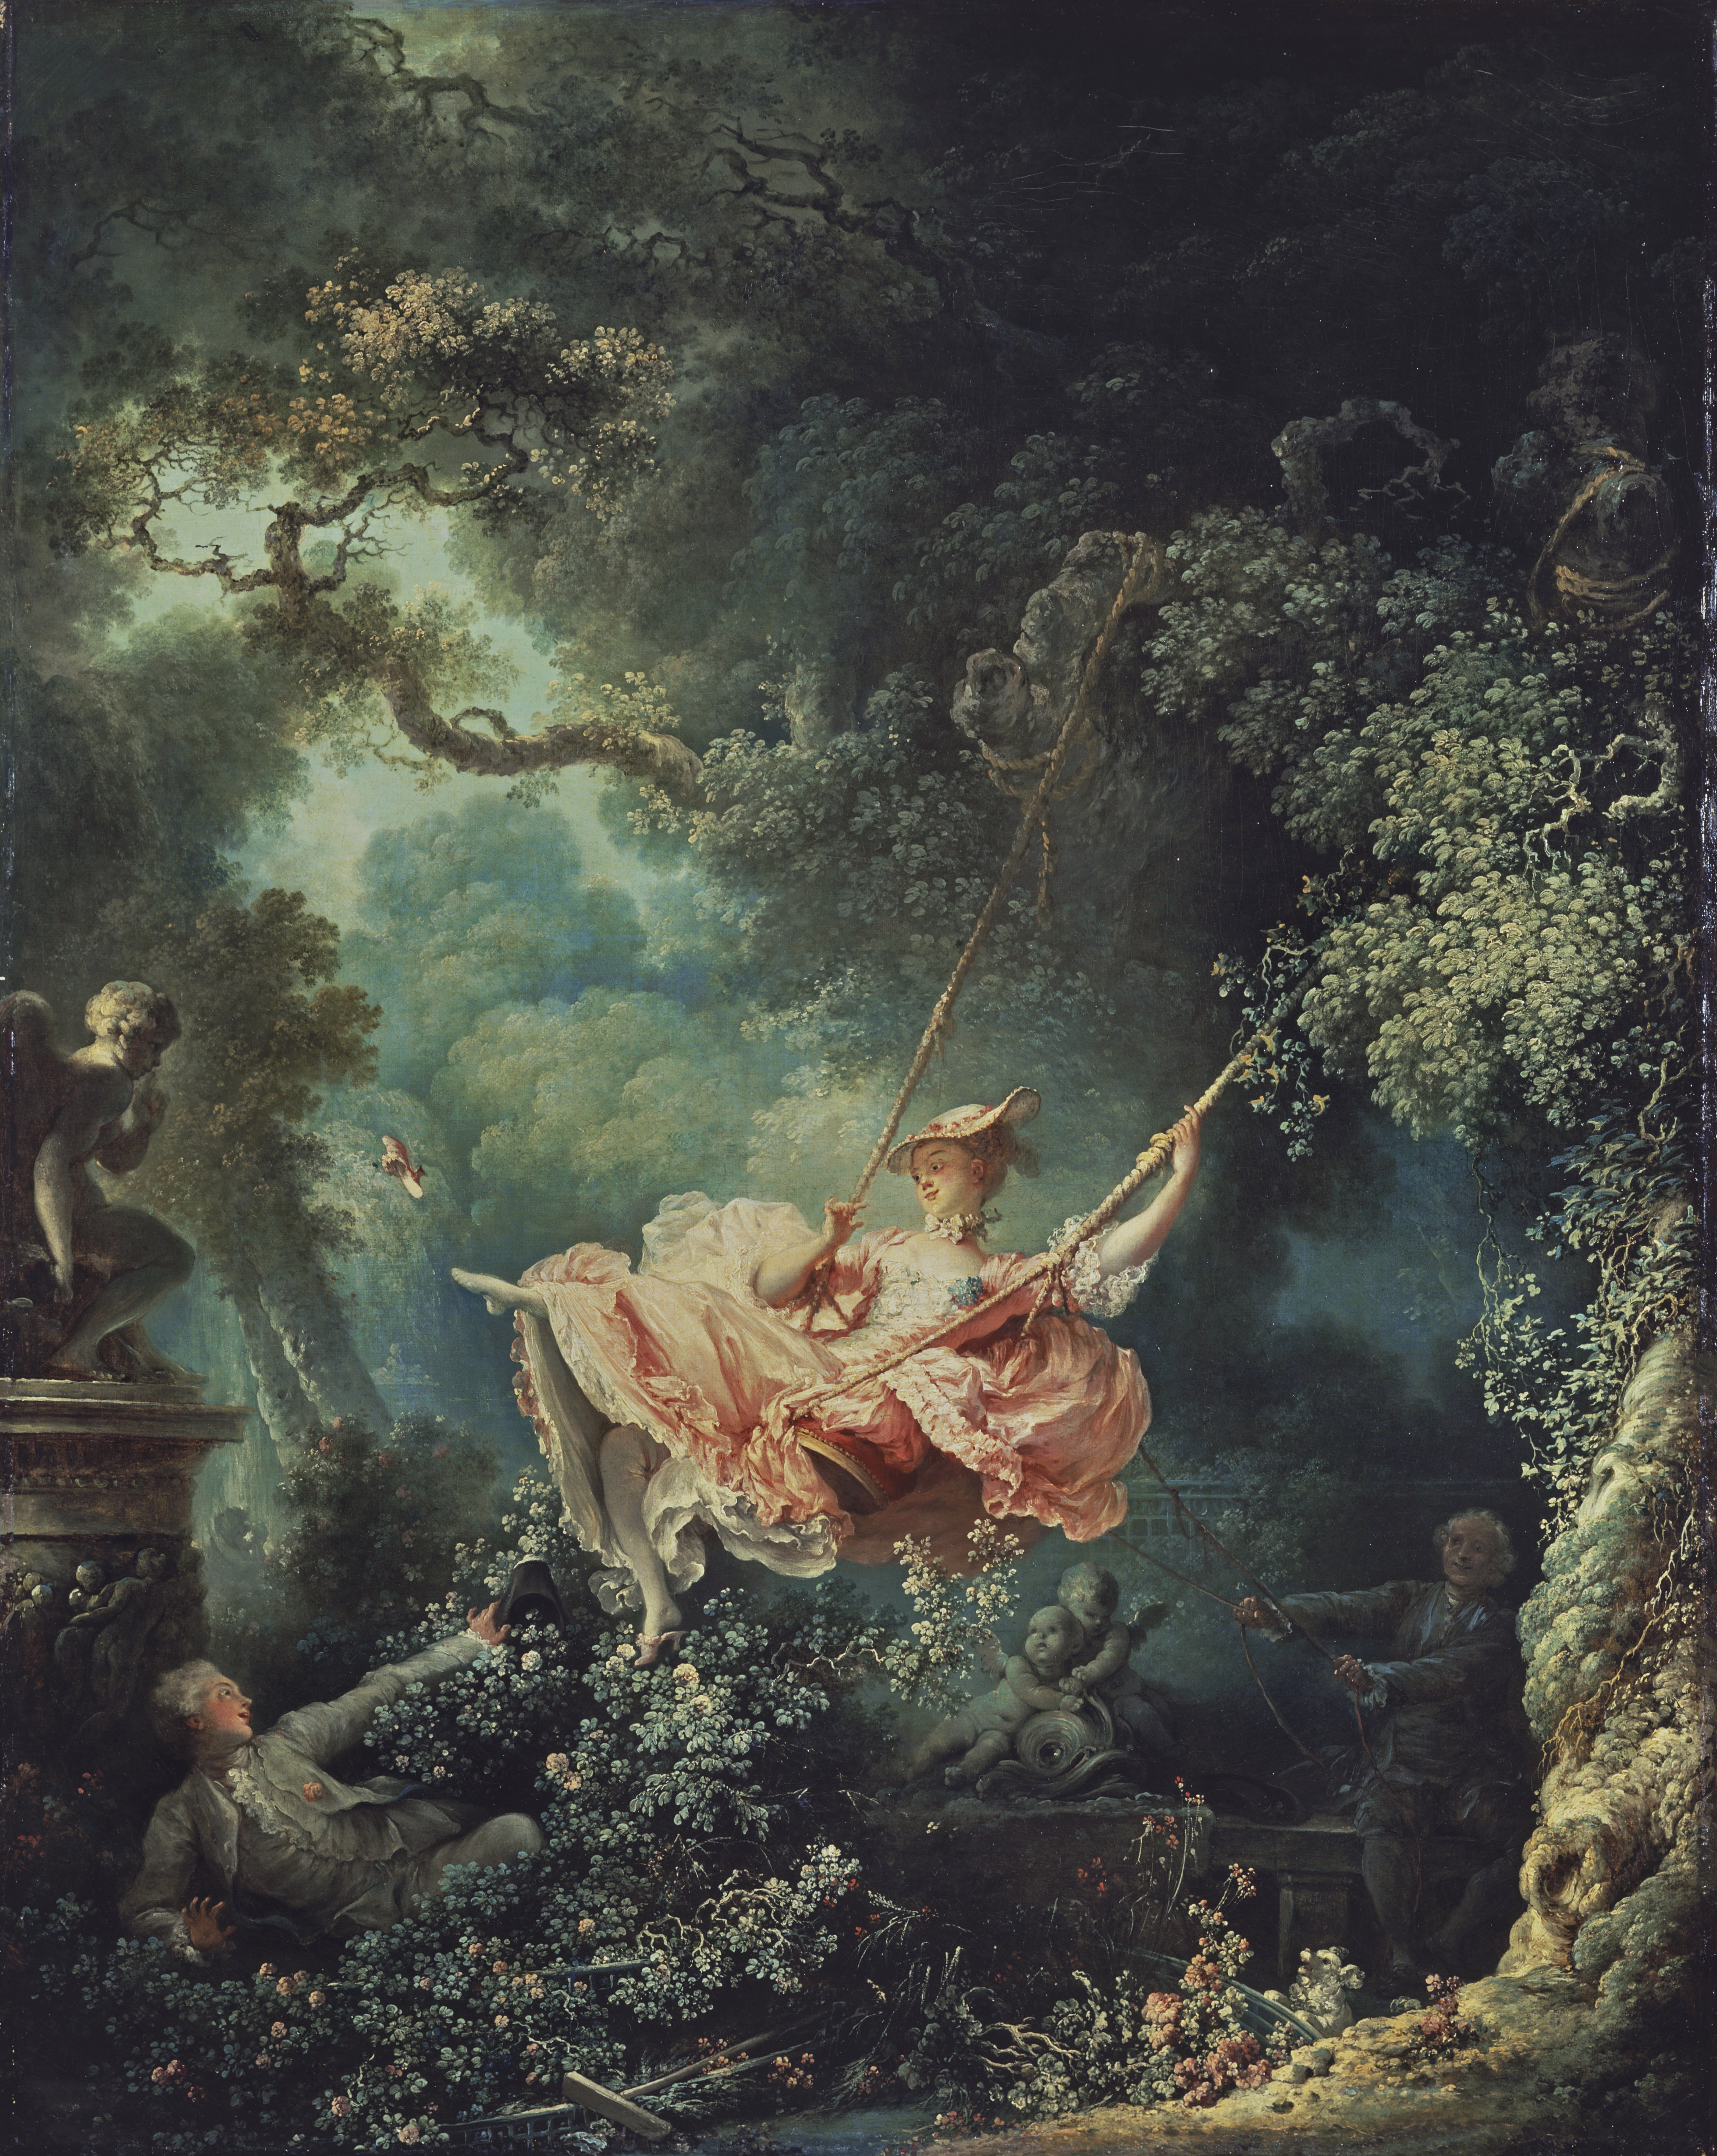
12 Art Historical Reproduction

Birth of Venus- Botticelli
Select one Art Historical painting/portrait and reproduce it photographically.
Medusa- Caravaggio

Judith Slaying Holofernes- Artemisia Gentileschi
Self Portrait- Rembrandt

Young Woman with a Water Jug- Jan Vermeer
Don Manuel Osorio Manrique de Zuñiga- Francisco Goya
The Swing- Fragonard

Viscount Lepic and his Daughters- Edgar Degas
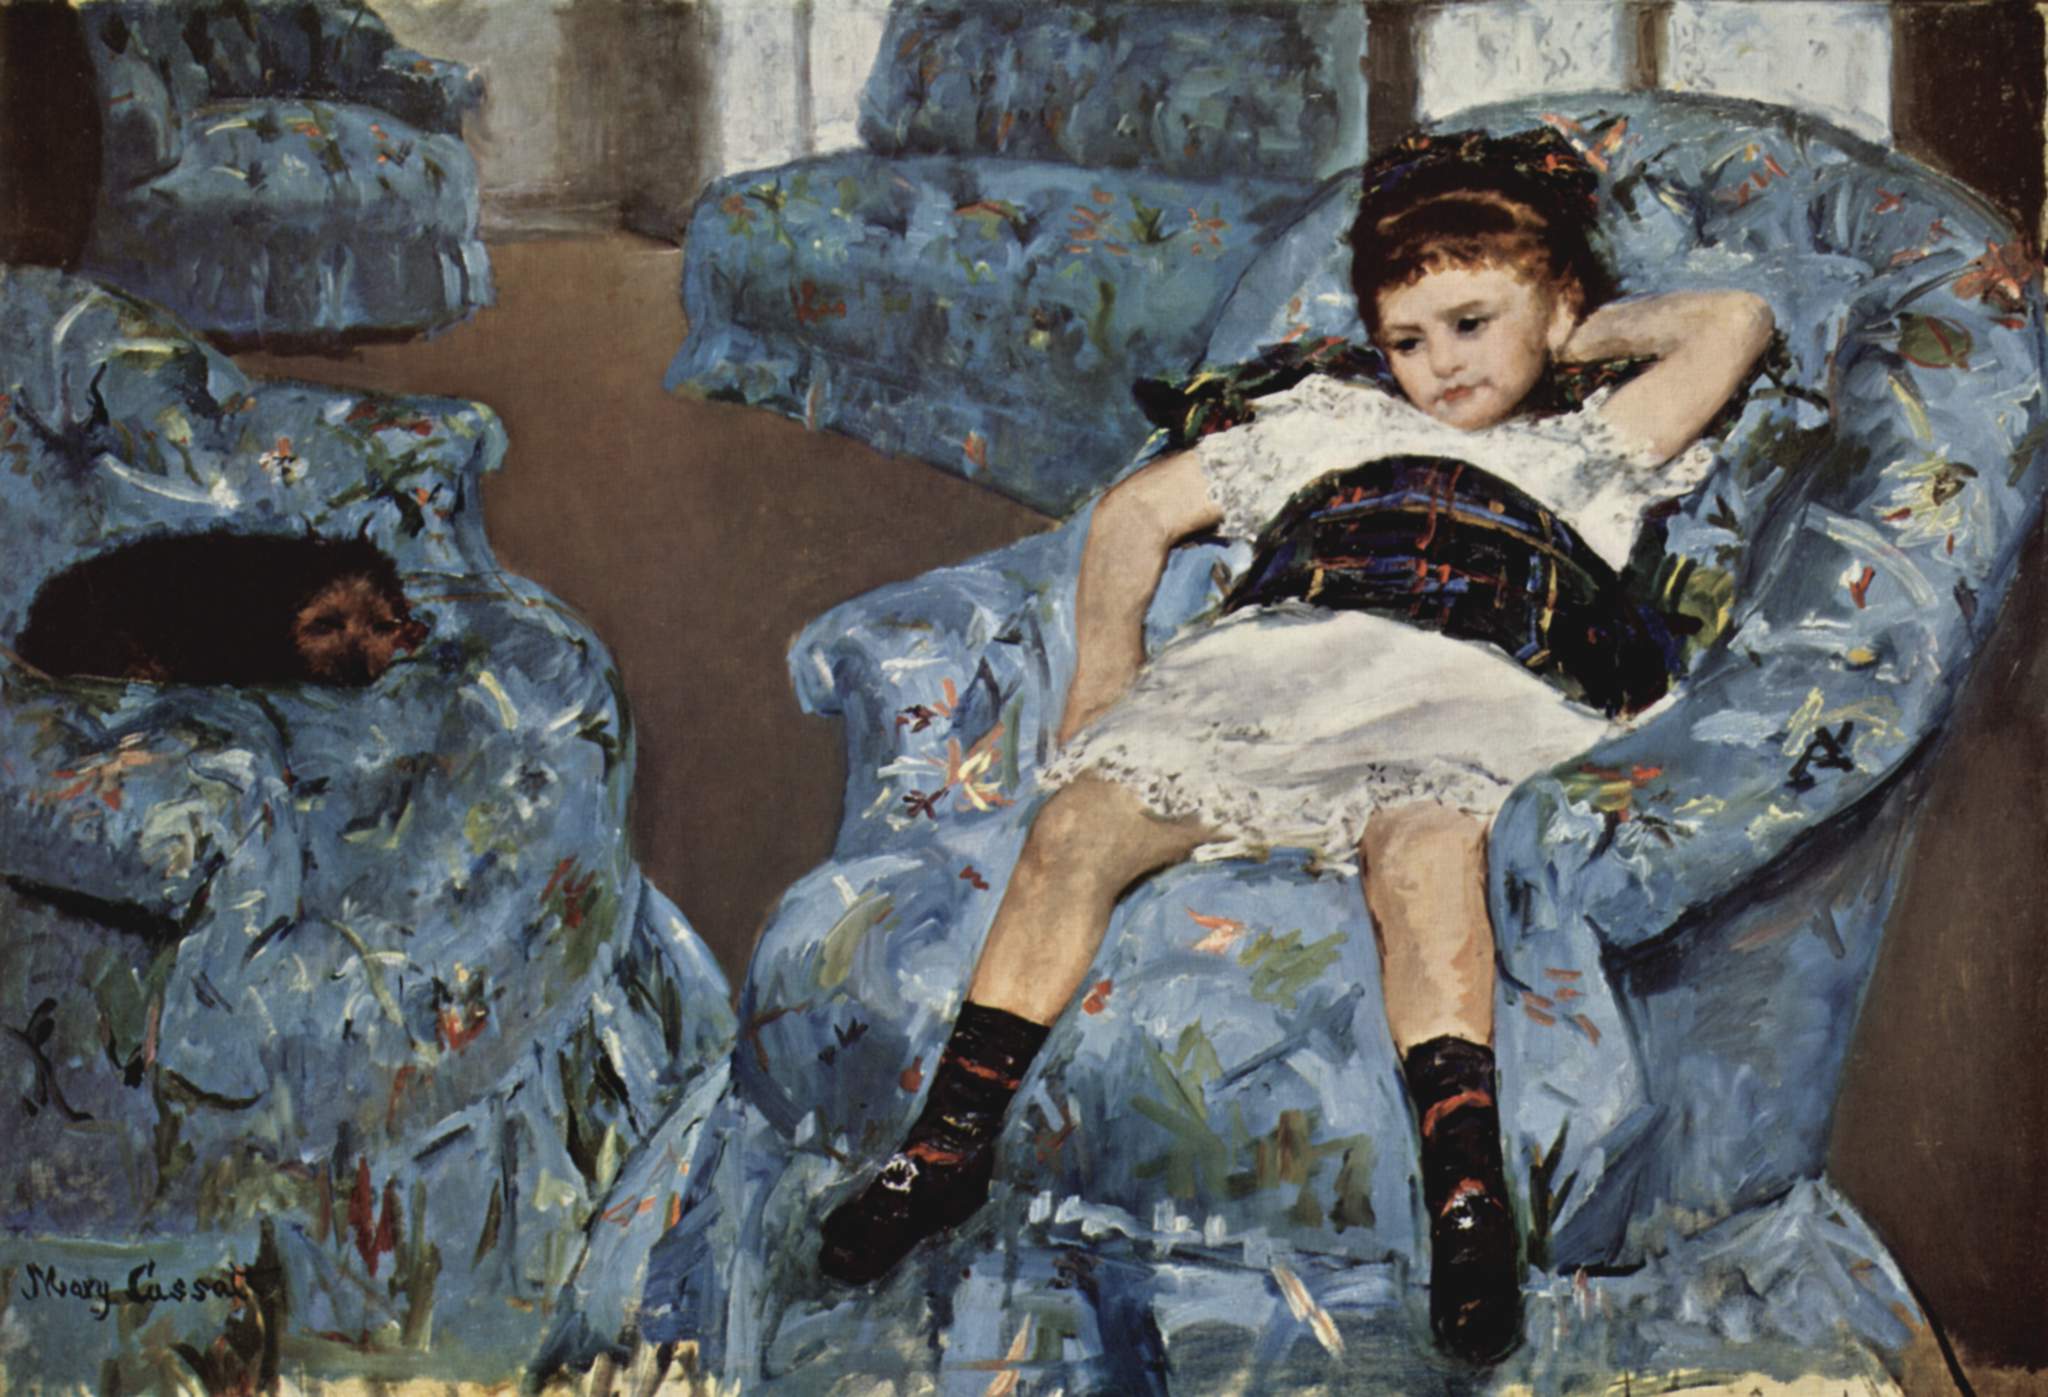
Little Girl in a Blue Armchair- Mary Cassatt
Old Guitarist- Pablo Picasso
Summer Evening- Edward Hopper

1         Select famous art historical painter who interests and inspires you (share this with the class, so there is no over lap). The content should be portrait based, have a story, they should have a keen awareness of light, colour (white balance), and details. 

2         Research information about your chosen one, post the image to your blog and relevant details. Your notes should include 5+ observations about their work and 5+ notes about the artist themselves: history, a description of their work and style,

3         Then plan how you are going to re-create their style- pay attention to details, props, lighting, expressions, models, costumes, poses, architectural feature. Fully plan to adopt every aspect of their style, format, subject matter, angles, and or perspective so that the original will be recognizable. You can create a modern adaptation, or try to recreate the era if you choose.

4         Take the photo mimicing the work of your chosen artist. Try various expressions, poses, angles, perspectives. Create a contact sheet post to the class sharing site, and post your three best variations and print one best final. You will be printing a final 8 x 10.

Monday, February 16, 2015

12 Mini Photo Essay

So just to get you started on creating an informative and interesting photo essay, I thought it would be good to practice around the school. You are to take a series of photos that inquire, explore, divulge and communicate about a topic in one or two (max.) classes. Experiment with different angles, distances, compositions, lighting etc to communicate your idea articulately.

You are to take at least 30-40 photographs of the topic, select 5 total photos. Create a contact sheet and post your 5 images to your blog.
Some ideas:
  • Day in the life of a custodian,
  • Office staff,
  • Comparison of people and thier lockers,
  • What students do on their spares,
  • A day in the cafeteria


Tuesday, February 3, 2015

11 Term 2 Assignment Check List

Here is what you should have on your blog for Term2:
6 Painting with Light Experiments- Contact Sheet of the experiments and best posted to blog.
3 HDR Landscapes- Contact Sheet and 1 Photoshop, 1 Photomatix, 1 Choice
3 Day to Night Portraits- Contact Sheet of the 9 evolution exposures from 3 shoots =27 total and 3 final best images (one from each shoot).
4 Photoshop Experiments- Day to Night, B/W, Short Depth of Field, Selective Colour.
2014 in Photos- 2 Favorite Photos from 2014, "Big News" and "Light Hearted".
Lana Slevic- Questions and answers.
3 Levitation- Contact Sheet and 3 best photos.
Cinematic Portrait Ideas- found photos and rough plan of attack...

Monday, January 26, 2015

12 Photo Essay

The Photo Essay
Watch
TED Talk with Paul Nicklen,  National Geographic Photographer
TED Talks with David Griffin, National Geographic Editor.

A photo essay is something designed for publication, either in print or on the internet. The guidelines below are based on the idea of an article presented as a series of two-page spreads as you might find in a newspaper or a magazine. Follow basic guidelines below.
Take at least 35 photos of your topic.
  1. First photo the viewer sees sums up the story in one shot. Be direct in communicating what this photo essay is about, i.e "Dance Show" take a photo of dancers getting ready in front of a mirror.
  2. Second photograph sets the scene straight away. Supports the idea give information.
  3. Include detail shots such to give a visual balance to your sequence of photographs.
  4. Leave open/white space occasionally. Be creative! White space can help to break up a rhythm that is in danger of becoming monotonous.
  5. The final image gives a feeling of completeness to the photo essay.
  6. Print a contact sheet of your 35 + photos (no more than 100). Print them out (not too big!) and spread them all out on a table.
  7. Select, edit and organize with a group. Then make a second choice, whittling it down to about six. Shuffle them around, try different combinations. What is most fascinating about creating a photo essay is the creative process and how you find new combinations and juxtapositions that enhance your work.
  8. Create a title. The title sums up your essay - it should be short and to the point. The first word is called 'the information word' and it is the most important. Here, the title is just three words long but it sums up the essay. Don't waste words.
  9. Create short captions. Short sentences that sum up the information offered in the photo.
Types of Photo Essays
Event photo essays: this type of photo essay centers around an event, usually a news type event such as Remembrance Day, or a school dance. May be photographed in a linear sequence, but not necessarily.
Time sequence photo essays: any linear sequence of events such as news events come in to this category. The time span can be one day day or one year or even a decade or two or longer.
Location photo essays: these can be done locally or when traveling and are usually thematic rather than linear.
Idea photo essays: this can be a series of photographs around a more abstract idea such as love, health, hope, poverty and so on.

5 Photo Essay Tips
A photo essay isn’t simply for photojournalists however. Every human being is drawn to stories. Whether you are an amateur or a professional, the photo essay is a brilliant way to bring your images to life and touch your friends, family, and fellow students.
Find a topic: Photo essays are most dynamic when you as the photographer care about the subject. Whether you choose to document the first month of a newborn in the family, the process of a school drama production, or even a birthday party, make your topic something in which you find interest.
Do some research: If you document a newborn’s first month, spend time with the family. Discover who the parents are, what culture they are from, whether they are upper or lower class. If you cover the process of a school’s drama production, talk with the teachers, actors and stage hands; investigate the general interest of the student body; find out how they are financing the production and keeping costs down. If you photograph a birthday party, check out the theme, the decorations they plan on using, what the birthday kid hopes to get for his or her gifts. All of these factors will help you in planning out the type of shots you set up for your story.

Find the “real story”: After your research, you can determine the angle you want to take your story. Is the newborn the first son of a wealthy family on whom the family legacy will continue? Or does the baby have a rare heart condition? Is the drama production an effort to bring the student body together? Or is it featuring a child star? Is the birthday party for an adolescent turning 13, or the last birthday of a dying cancer patient? Though each story idea is the same, the main factors of each story create an incredibly unique story.
Touch the heart of its audience. Anger. Joy. Fear. Hurt. Excitement. The best way you can connect your photo essay with its audience is to draw out the emotions within the story and utilize them in your shots. This does not mean that you manipulate your audience’s emotions. You merely use emotion as a connecting point.
Plan your shots: Whether you decide to sit down and extensively visualize each shot of the story, or simply walk through the venue in your mind, you will want to think about the type of shots that will work best to tell your story. I recommend beginners first start out by creating a “shot list” for the story. Each shot will work like a sentence in a one-paragraph story. Typically, you can start with 10 shots. Each shot must emphasize a different concept or emotion that can be woven together with the other images for the final draft of the story.

Photo Essay Examples
Dina Goldstein- check out the "Track Record" my favourite
Life- After Forclosure
James Nachtwey- World renown Photojournalist, heart wrenching stories.
Chris Jordan
Natalie Behring
Carol Guzy
20 Great Photojournalists

Evaluation:
Print a contact sheet and seven 5 x 7 prints or post them on a blog...
Contact Sheet: Clearly/thoroughly explores your chosen topic in 35 frames. Compositionally strong, creative treatment of subject, technically sound (lighting, exposure, focus, depth of field, shutter, ISO etc), professional-top seven images are selected. 10 marks

7 Prints: 5 marks each for a total of 35 marks
Each image is:
1. Technically sound (focus, depth of field, exposure, shutter)
2. Compositional devices used to create eye catching photographs (strong emphasis and elements and principals of design used).
3.Story is clearly expressed- photo essay techniques used.
4. Creative treatment of topic.
5. Series is presented in an professional way. Include captions for each image
(If you post it on the internet, make sure you have permission from your subject)